Old Starter Sitting on My Garage Floor
Howdy Again Everyone,
In my last blog I talked about my first steps to repairing the starter system on my XS70E. I talked about testing the solenoid and battery. The next step I had to undergo was testing the starter motor. This whole process is described below.
In my last blog I talked about my first steps to repairing the starter system on my XS70E. I talked about testing the solenoid and battery. The next step I had to undergo was testing the starter motor. This whole process is described below.
Removing the Starter
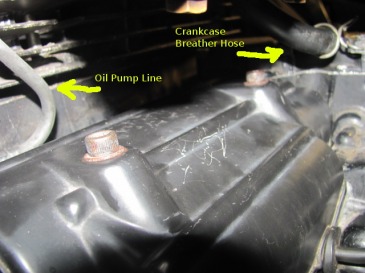
Figure 1: The starter motor sits under a black plastic cover as shown.
Before removal, the crankcase breather hose and oil pump line
need to be disconnected and moved to the side.
Before removal, the crankcase breather hose and oil pump line
need to be disconnected and moved to the side.
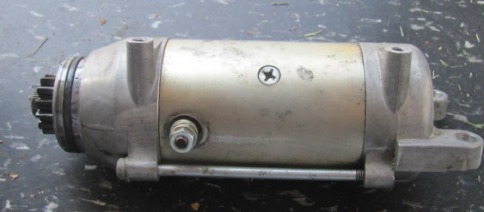
The first thing I had to do to test the starter was remove it from it's position on the bike. When the starter motor is installed, the gear that it drives remains connected to the starter clutch. This means that if there is something wrong with the starter clutch (jammed gears), the starter motor won't turn even if it is functioning optimally. Thus, I needed to disengage and remove the starter motor entirely to test it in an isolated manner.
The starter motor on the XS750E rests under the carburetor which sits just under the gas tank. Essentially, the starter motor sits on top of the oil pan and is covered by a piece of plastic. The starter motor location is depicted in Figure 1. Also notice that I pointed out the crankcase breather hose and the oil pump line in Figure 1. These two lines needed to be disconnected and moved off to the side in order to remove the starter cover and starter.
The starter motor on the XS750E rests under the carburetor which sits just under the gas tank. Essentially, the starter motor sits on top of the oil pan and is covered by a piece of plastic. The starter motor location is depicted in Figure 1. Also notice that I pointed out the crankcase breather hose and the oil pump line in Figure 1. These two lines needed to be disconnected and moved off to the side in order to remove the starter cover and starter.


 RSS Feed
